
To replace a range hood filter, remove the old filter and insert a new one. A range hood filter needs to be replaced regularly to ensure optimal performance.
Over time, grease and debris accumulate in the filter, reducing its efficiency. If you’re unsure about how often to replace the filter, refer to the manufacturer’s instructions. Replacing the filter is a simple task that can be done in minutes.
Here’s a step-by-step guide on how to replace a range hood filter. Step 1: turn off the range hood and unplug it from the power source to ensure safety. Step 2: locate the filter on the underside of the range hood. It is usually behind a panel or a removable cover. Step 3: remove the panel or cover to access the filter. Some filters may have tabs or clips that need to be released. Step 4: carefully take out the old filter and dispose of it properly. Step 5: take the new filter and insert it into the designated slot. Ensure it is securely in place. Step 6: put back the panel or cover and secure it in position. Step 7: plug in the range hood and turn it on to make sure everything is functioning correctly. By following these steps, you can easily replace the range hood filter and maintain clean and efficient air circulation in your kitchen. Remember to regularly check and clean the filter to ensure its longevity and effectiveness.
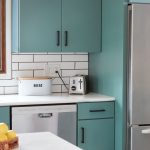
:max_bytes(150000):strip_icc()/blue-white-kitchen-6c293c9d-0221-269a5c7c1ba34c6fafa81ddfc851e230.jpg)
Credit: www.marthastewart.com
Step 1: Understanding The Range Hood Filter
Replacing the range hood filter is an essential maintenance task that ensures your kitchen ventilation system works efficiently. In this blog post, we will guide you through the step-by-step process of replacing your range hood filter. In this first step, we will focus on understanding the range hood filter itself.
Types Of Range Hood Filters
Understanding the different types of range hood filters will help you identify and choose the right filter for your range hood. Here are the common types:
- Mesh filters: These filters are made of layers of metal mesh that trap grease and debris. They are easy to clean and can withstand high temperatures.
- Charcoal filters: Designed to remove odors, charcoal filters contain activated charcoal that absorbs smells and pollutants. They are not washable and need to be replaced periodically.
Identifying The Filter In Your Range Hood
Before you begin the replacement process, it is crucial to identify where the filter is located in your range hood. The exact placement may vary depending on the model and type of range hood, but here are the general steps to locate the filter:
- Look for the filter access panel: Most range hoods have a removable panel that provides access to the filter. It is often located underneath the hood cover or at the rear of the hood.
- Check the user manual: If you’re unsure about the filter’s location, consult the user manual that came with your range hood. It usually contains detailed instructions and diagrams.
- Visual inspection: Take a close look inside the range hood to spot any visible signs of the filter. Look for a metal mesh or a charcoal insert.
By understanding the types of range hood filters and identifying the filter in your specific range hood, you’ll be well-prepared to proceed with the next step of the replacement process. Remember, regular filter maintenance is crucial for maintaining optimal performance and air quality in your kitchen.
So, let’s move on to the next step and learn how to remove the old filter.
Step 2: Gathering The Necessary Tools And Materials
Before jumping into the process of replacing your range hood filter, it’s essential to gather all the necessary tools and materials in advance. This will ensure a smooth and efficient replacement process, saving you time and effort. In this step, we will discuss the tools needed for the replacement as well as the different types of filter materials available.
List Of Tools Needed For The Replacement:
- Screwdriver (the type may vary depending on your range hood model)
- Disposable gloves (to maintain hygiene and avoid direct contact with grease and debris)
- Cleaning solution or mild detergent (for cleaning the filter if it is reusable)
- Soft brush or sponge (to assist in cleaning the filter)
- Towels or old newspapers (to protect your work surface from any spills or debris)
- Replacement filter (make sure you have the correct filter size and type for your range hood model)
Types Of Filter Materials Available:
Range hood filters come in different materials, each with its own set of benefits and considerations. Here are the most common types:
- Aluminum mesh filters: These filters are durable and effective at capturing grease and other airborne particles. They are easy to clean and can be reused multiple times with proper maintenance.
- Charcoal filters: These filters contain activated charcoal, which helps eliminate odors from cooking fumes. They are typically used in ductless range hoods but may need to be replaced more frequently compared to aluminum filters.
- Carbon filters: Similar to charcoal filters, carbon filters also help remove odors but may have a longer lifespan. They are often used in combination with other filter types for enhanced filtration.
- Baffle filters: These filters use a series of curved metal panels to redirect airflow and trap grease effectively. They are commonly found in high-end range hoods and provide superior performance and durability.
Depending on your specific needs and the type of range hood you have, you can choose the most suitable filter material for optimal filtration and maintenance. Remember to check your range hood’s manual or consult a professional if you are unsure about the specific filter requirements.
Now that we’ve covered the necessary tools and filter materials, in the next step, we will proceed with removing the old range hood filter. Stay tuned for step 3: removing the old filter.
Step 3: Preparation Before Replacement
Step 3: Preparation Before Replacement
Before you start replacing your range hood filter, it’s important to take a few preparatory steps to ensure a smooth and safe process. Follow these guidelines to get ready:
Turning Off The Power Supply
- Locate the power switch for your range hood. It is usually found either on the hood itself or on a nearby wall.
- Turn off the power supply to avoid any electrical accidents during the replacement.
- Make sure to unplug the range hood from the wall outlet to completely disconnect it from the power source.
Removing Any Grease Buildup
- Grease buildup can affect the performance of your range hood and even pose fire hazards. Before replacing the filter, it’s important to remove any excess grease.
- Use a soft cloth or sponge and a mild detergent to clean the exterior surfaces of the range hood.
- Pay special attention to the areas around the filter, as grease tends to accumulate there.
- Wipe away any grease or dirt carefully, ensuring that you don’t scratch or damage the hood’s surface.
By following these simple steps, you’ll be well-prepared to replace your range hood filter safely and efficiently. Taking the time to turn off the power supply and remove grease buildup will not only make the replacement process easier but also help to extend the lifespan of your range hood.
Stay tuned for the next step in our guide.
Step 4: Removing The Old Filter
One of the key steps in replacing your range hood filter is properly removing the old filter. This step is crucial to ensure that you can successfully install the new filter and maintain the functionality of your range hood. In this section, we will guide you through the process of detaching the old filter, so let’s get started.
Accessing The Filter Compartment
Before you can remove the old filter, it’s important to locate and access the filter compartment of your range hood. Here are the key points to keep in mind:
- Identify the location of the filter compartment, which is typically located underneath the range hood. Refer to your range hood’s manual or manufacturer’s instructions for specific guidance.
- Ensure that your range hood is turned off and disconnected from any power source before attempting to access the filter compartment.
- In some cases, you may need to remove any grease or debris that has accumulated around the filter compartment to ensure proper access.
Properly Detaching The Old Filter
Now that you have accessed the filter compartment, it’s time to remove the old filter. Follow these steps to ensure a smooth removal process:
- Carefully examine the old filter and locate any locking mechanisms or clips that are holding it in place. These may vary depending on the specific model of your range hood.
- If your filter has locking mechanisms, release them by following the manufacturer’s instructions. This may involve twisting, lifting, or sliding the filter to disengage it from the compartment.
- If your filter is held in place by clips, gently press on the clips to release the filter. Be cautious not to damage the filter or the clips during this process.
- Once the locking mechanisms or clips have been disengaged, carefully slide or lift the old filter out of the compartment. Keep in mind that the filter may be greasy or dirty, so handle it with care to avoid any mess or contamination.
Remember, each range hood may have specific instructions for detaching the old filter, so refer to your manual or manufacturer’s guidelines to ensure the correct removal procedure.
Congratulations! You have successfully completed the fourth step of replacing your range hood filter by detaching the old filter. In the next step, we’ll guide you through installing the new filter, so stay tuned.
Step 5: Cleaning The Filter Housing
Importance Of Cleaning The Housing
Cleaning the housing of your range hood filter is a vital step in maintaining the efficiency and functionality of your kitchen ventilation system. Over time, grease, dust, and other debris can accumulate inside the filter housing, leading to reduced airflow and potential issues with your range hood’s performance.
By regularly cleaning the housing, you can ensure that your range hood operates at its best, keeping your kitchen free from smoke, odors, and airborne contaminants.
Here are the key points to remember when it comes to cleaning the housing:
- Remove the filter: Start by removing the range hood filter from the housing. This will give you easy access to the interior of the housing, allowing for a thorough cleaning.
- Disconnect power supply: Before proceeding with the cleaning process, be sure to disconnect the power supply to the range hood to avoid any electrical hazards.
- Wipe down surfaces: Using a damp cloth or sponge, wipe down the interior surfaces of the filter housing. Be sure to remove any grease or dirt buildup, paying special attention to corners and crevices.
- Use a mild detergent: For tougher stains or grime, a mild detergent diluted in warm water can be used. Apply the solution to a cloth or sponge and gently scrub the surfaces of the housing.
- Rinse and dry: Once the cleaning is complete, rinse the interior of the housing with clean water to remove any residue from the detergent. After rinsing, allow the housing to air dry completely before reattaching the filter.
Regular maintenance and cleaning of the filter housing will not only enhance the longevity and performance of your range hood but also contribute to a clean and healthy kitchen environment. By following these cleaning methods and incorporating them into your routine, you can enjoy a well-functioning range hood that effectively removes smoke, grease, and odors from your cooking space.
Step 6: Selecting And Installing The New Filter
So you’ve made it to the final step in replacing your range hood filter – selecting and installing the new one. This step is crucial to ensure that your range hood operates efficiently and effectively. To help you navigate this process with ease, follow the guidelines below:
Choosing The Correct Filter For Your Range Hood:
- Consider the type of range hood you have: There are different types of filters available for various range hoods, such as charcoal filters for ductless range hoods and aluminum mesh filters for ducted range hoods. Make sure to check your range hood manual to determine the specific type of filter required.
- Evaluate the filtration needs: Depending on your cooking habits and the amount of grease, smoke, and odors generated, you may need a specific type of filter with enhanced filtration capabilities. Look for filters labeled with high-efficiency or multi-layered for optimal performance.
- Check the filter dimensions: It is essential to measure the dimensions of your old filter accurately. Filter sizes can vary, so ensure that the new filter matches the dimensions of the existing one to ensure a proper fit.
Proper Installation Techniques:
- Turn off the range hood: Safety should always be the priority. Before proceeding with the installation, switch off the range hood and unplug it from the power source. This precautionary step will help prevent any accidents or electrical shocks.
- Remove the old filter: Depending on the range hood model, this step might involve either sliding out the filter or unscrewing it. Carefully detach the old filter from the range hood, taking note of any clips or locking mechanisms that need to be disengaged.
- Insert the new filter: Align the new filter with the designated space in the range hood. Ensure that it fits securely and locks into place. If your range hood uses a clip system or screws, secure the filter accordingly.
- Double-check the installation: Once the new filter is in place, give it a gentle tug to ensure it is securely installed. Any loose filters can hinder the range hood’s performance and efficiency.
By following these simple steps, you can be confident in selecting the correct filter for your range hood and installing it properly. Remember, regular filter replacement is essential to maintain the functionality and lifespan of your range hood. So keep a note of the recommended replacement intervals, and enjoy improved air quality in your kitchen!
Step 7: Final Touches And Safety Tips
If you’ve followed all the previous steps on how to replace a range hood filter, congratulations on reaching the final touch-up stage! This step involves reassembling any detached parts and ensuring the range hood is functioning correctly after the replacement.
It’s essential to prioritize safety during this process, so let’s dive into the details.
Reassembling Any Detached Parts
After removing and replacing the range hood filter, you may have detached certain parts to access the filter chamber. Now, it’s time to put everything back together. Here are the key points to remember:
- Refer to the user manual: If you’re unsure about the correct placement of certain parts, consult the user manual provided with your range hood. It will give you detailed instructions on reassembling all the components correctly.
- Take it slow: As you reattach each part, do it carefully and avoid rushing the process. Double-check that each piece fits in the designated spots snugly.
- Secure all connections: Ensure that any wires or cables are properly connected and secured. Loose connections can impact the functionality and safety of your range hood.
Testing The Range Hood After The Replacement
Once you’ve reassembled all the detached parts, it’s time to check if your range hood is operating smoothly. Here’s what you need to do:
- Turn on the power: Plug in your range hood and switch on the power.
- Check the fan and lights: Activate the fan and lights to see if they function correctly. Listen for any strange noises and observe the airflow from the fan.
- Verify the controls: Test all the controls on your range hood, such as fan speed settings and light switches. Ensure that each button or knob operates smoothly and performs its intended function.
- Monitor for any issues: Keep an eye out for any unusual behavior, such as flickering lights or weak airflow. These signs may indicate other underlying issues that need addressing.
As a final safety tip, always remember to follow the manufacturer’s guidelines and recommendations for maintenance, as they can vary from brand to brand. Regularly replacing your range hood filter is essential for efficient air filtration and maintaining a clean kitchen environment.
By completing these steps carefully, you can ensure the optimal performance of your range hood for years to come.
Frequently Asked Questions For How To Replace Range Hood Filter
How Often Should I Replace My Range Hood Filter?
Range hood filters should be replaced approximately every 6-12 months, depending on usage. Regular replacement ensures optimal performance and prevents buildup of grease and odors in your kitchen.
How Do I Know If My Range Hood Filter Needs Replacing?
A quick visual inspection can tell you if it’s time to replace your range hood filter. Look for discoloration, grease buildup, or a strong odor coming from the filter. If any of these signs are present, it’s time for a replacement.
Can I Clean And Reuse My Range Hood Filter?
Yes, some range hood filters can be cleaned and reused. However, not all filters are washable, so be sure to check the manufacturer’s instructions. If your filter is washable, clean it regularly to maintain its effectiveness and extend its lifespan.
How Do I Remove And Replace My Range Hood Filter?
To remove your range hood filter, simply unhook it from its designated spot. Then, replace it with a new or cleaned filter by hooking it back into place. Refer to your range hood’s manual for specific instructions, as the process may vary depending on the model.
Where Can I Buy A Replacement Range Hood Filter?
Replacement range hood filters can be found at hardware stores, home improvement centers, and online retailers. Make sure to know your range hood’s model number and filter size before purchasing to ensure compatibility.
Conclusion
Keeping your range hood filter clean is crucial for maintaining a healthy and efficient kitchen environment. Regularly replacing the filter ensures that it effectively removes grease, odors, and airborne particles, improving the air quality in your home. By following the simple steps outlined in this guide, you can easily replace your range hood filter without any hassle.
Remember to choose the right filter type and size, detach the old filter carefully, clean surrounding areas, insert the new filter correctly, and reassemble the range hood. Stay on top of maintenance and replace the filter every three to six months, or as recommended by the manufacturer.
With a clean range hood filter, you can enjoy fresh, odor-free air and a properly functioning ventilation system. So, don’t wait, give your range hood the care it deserves and experience the benefits of a clean and healthy kitchen environment.

Freda is a passionate foodie and kitchen gadget enthusiast. With over 10 years of experience in the culinary industry, Freda brings her expertise in testing and reviewing kitchen gadgets.