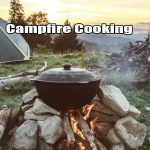

To make a smoker while camping, you need a metal container, a grill grate, aluminum foil, wood chips, and a heat source. Camping trips are an excellent way to unwind and connect with nature.
One of the most enjoyable parts of camping is cooking in the great outdoors. While you might want to cook basic meals over a campfire, you might also crave something a bit more exciting, like smoked meat. But, how can you smoke meat in the middle of nowhere?
Materials Required
Have you ever been camping and wished you could smoke some fresh fish or meat? Well, with a homemade smoker, you can! Here is a list of materials you will need to build a smoker, as well as some alternatives that work just as well.
List Of Materials You Will Need To Build A Smoker
- A large metal trash can with lid
- A drill with a 1-inch spade bit
- Charcoal grilling pan for barbecue
- Grilling racks
- 4 l-brackets and screws
- A thermometer
- Bbq gasket sealant
- Aluminum foil
- Wood chips
Detailed Description Of Each Material
- A large metal trash can with lid: The trash can will be the main body of your smoker. It should be made of sturdy metal and have a tight-fitting lid to seal in the smoke. If you are using a shiny metal can, you will need to season it by coating the inside with cooking oil and burning a hot fire inside to remove any chemical residues.
- A drill with a 1-inch spade bit: You will need to drill a hole near the bottom of the trash can for the damper that controls the airflow into the smoker. The spade bit is the fastest and easiest way to make the hole.
- Charcoal grilling pan for barbecue: You will need a rectangular grilling pan to hold the charcoal for the heat source. The pan should be smaller than the diameter of the trash can and have a depth of 2-3 inches.
- Grilling racks: You will need two or three grilling racks that fit inside the trash can to hold your food.
- 4 l-brackets and screws: You will use the l-brackets to support the grilling racks at varying heights. They also provide a stable attachment point for the thermometer.
- A thermometer: A smoker thermometer is an essential tool for controlling the temperature inside the smoker. It should be mounted at the same level as the meat you are smoking.
- Bbq gasket sealant: You will need to seal the lid of the trash can to prevent smoke from escaping and keep the temperature consistent inside. Bbq gasket sealant is a heat-resistant adhesive that creates a seal between the lid and the body of the can.
- Aluminum foil: You will need aluminum foil to cover the grilling pans and to wrap your food during smoking.
- Wood chips: For flavor, you will need wood chips to produce smoke. Mesquite, applewood, and hickory are popular choices for smoking meat.
Suggestions For Alternative Materials
- Trash can alternative: If you don’t have a large metal trash can, you can use an old beer keg or a 55-gallon drum made of steel or cast iron.
- L-bracket alternatives: If you don’t have l-brackets, you can use clothes hangers or lengths of wire to suspend the grilling racks.
- Wood chip alternatives: For a variety of flavors, you can experiment with fruitwood or nutwood such as cherry, pecan, or walnut. You can also use herbs such as rosemary, thyme, or sage to add flavor to your food while smoking.
With these materials, you’ll be on your way to making delicious smoked food while camping. So gather your supplies and get to building!
Preparation
Finding The Right Location For Your Smoker
Before you start building your smoker, you need to think about the perfect location for it. Here are some things to consider:
- Make sure the area is sheltered from wind and rain to keep your smoker safe from harsh weather conditions.
- Choose an area that is a safe distance from any dry vegetation or trees to avoid the risk of starting a fire.
- Ensure that your smoker is not placed in a location where smoke can accumulate around your tent or campsite and cause discomfort to other campers.
Preparing The Materials Before You Start Building
Once you’ve found the right location for your smoker, it’s time to prepare all of the materials you will need for the build. Before starting, you should make sure to do the following:
- Plan your smoker design and determine the required measurements based on your smoking needs.
- Purchase all construction materials beforehand, including steel sheets, nuts, bolts, and fire-resistant tape.
- Clean and polish all materials before cutting and welding to prevent rusting.
How To Measure And Cut The Materials Correctly
Having the right measurements is crucial when making your smoker while camping. Here are some tips to help you in measuring and cutting the materials:
- Measure the materials twice before cutting to avoid making any mistakes.
- Use a marker or chalk to trace the cutting lines for increased accuracy.
- Use a saw to cut all the materials, ensuring that each cut matches the required dimensions.
- Once you’ve made all the cuts, sand down all the rough edges to remove any sharp or uneven points.
By following these tips, you can plan, prepare and execute a successful smoker build while on your camping trip. Happy smoking!
Building The Smoker
Building the smoker:
If you’re looking for the ultimate way to add some delicious flavor to your camping meals, then building a smoker is the way to go. With just a few simple materials, you can create a sturdy and durable smoker that’s perfect for use in the great outdoors.
In this section, we’ll show you how to build a smoker step-by-step, and also provide you with some tips and tricks to ensure that your smoker is long-lasting and effective.
Step-By-Step Guide On How To Build The Smoker:
- First, gather all the materials you’ll need. This includes an aluminum pan or baking sheet, a cooling rack, a power drill, and a metal file.
- Take the aluminum pan or baking sheet and drill several small holes in the bottom.
- Next, using the metal file, file down any sharp edges around the holes to ensure safety.
- Place the cooling rack on top of the drilled aluminum pan or baking sheet.
- Now it’s time to get creative with the smoke source. You can use anything from wood chips to charcoal. Simply place your smoke source in the bottom of the pan, under the cooling rack.
- To add some extra flavor to your smoked food, you may also want to add some herbs or spices to the smoke source.
- Once your smoke source is in place, simply put your food on the cooling rack and let the smoke do its magic!
- Make sure to carefully monitor the temperature of the smoker using a thermometer, to ensure that your food is cooked safely and thoroughly.
Tips And Tricks For Ensuring The Smoker Is Sturdy And Durable:
- To ensure that your smoker lasts for years to come, use high-quality materials when building it.
- Opt for a thicker aluminum pan or baking sheet, to make sure that it can withstand the heat of the smoke source.
- If possible, use stainless steel for the cooling rack, as it is more resistant to corrosion.
- When drilling the holes in the aluminum pan or baking sheet, make sure not to create too many, as this can weaken the structure.
- Store your smoker in a dry, cool place to prevent rust and damage.
Visual aids and diagrams:
To ensure that you understand all the steps involved in building your smoker, we’ve included some helpful diagrams below.


With these step-by-step instructions and tips, you’ll be well on your way to creating a homemade smoker that will impress all your camping companions. Happy smoking!
Adding Finishing Touches
After successfully creating your own smoker while camping, it’s time to add some personal touches to make it your own. Here are some optional finishing touches you can add to your smoker:
Optional: Adding A Paint Job Or Other Decorative Elements To The Smoker
- Painting your smoker with heat-resistant paint is a great way to add a personal touch and protect the metal from rusting.
- You can also add decorative elements to give your smoker some character and showcase your creativity. Some examples include stickers, decals, and custom logos.
Discussing Potential Upgrades Or Modifications To The Basic Design
- Consider adding a temperature gauge to monitor the internal temperature of your smoker more accurately.
- Another modification you can make is to add a water pan to your smoker to help keep the meat moist during the smoking process.
- You may also want to add more ventilation to your smoker by installing additional vents to regulate the airflow inside the smoker.
Remember, while these modifications and upgrades are optional, they can enhance the functionality and appearance of your smoker. Experiment and have some fun making your smoker unique to you.
Using The Smoker
Instructions on how to use the smoker for cooking various meats and vegetables:
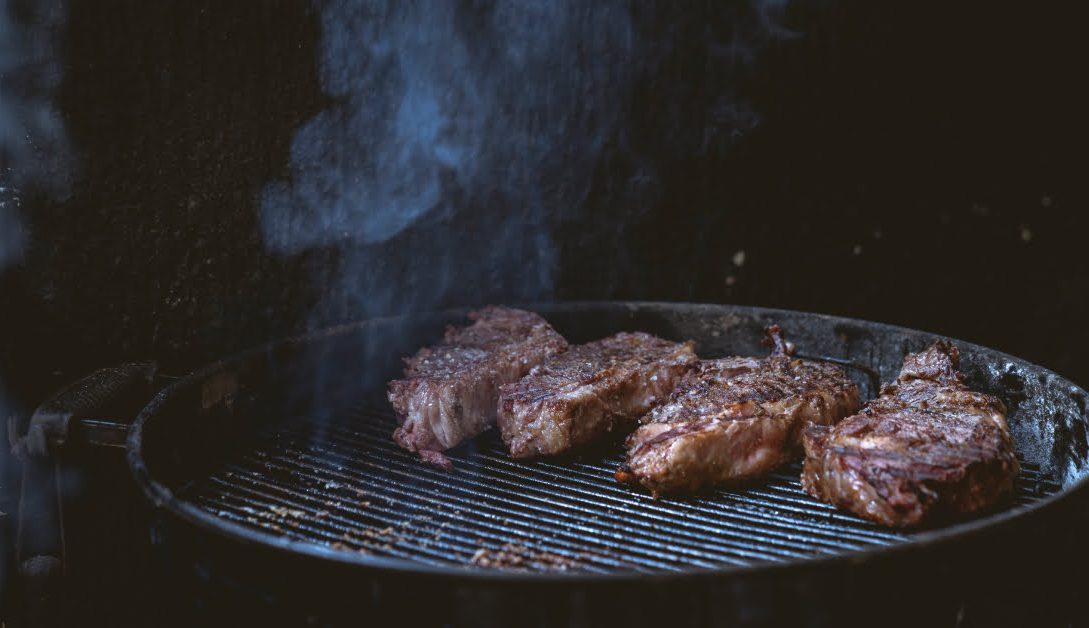
Using a smoker while camping is an excellent way to elevate your outdoor cooking game. The smoky flavor adds depth and complexity to your dishes, making even the simplest of meals a culinary delight. Here are some key points to keep in mind when using a smoker for cooking various meats and vegetables:
- First, ensure that the smoker is clean and ready to use. Remove any leftover ash and debris from the previous use.
- Next, add the wood chips according to the smoker’s instructions. Different types of wood chips can be used to impart unique flavors to your food.
- Preheat the smoker and let it reach the desired temperature before adding your ingredients. The ideal temperature range is generally between 225℉ to 250℉.
- Add your meat or vegetables to the smoker. Make sure to leave adequate space between each piece, allowing smoke to circulate evenly.
- Check the temperature of the smoker and your ingredients frequently to ensure that they are cooking at the desired temperature.
- Once the ingredients are cooked to your liking, remove them from the smoker and allow them to rest for a few minutes before serving.
Using a smoker requires patience and attention to detail, but the results are certainly worth it!
Tips on how to maintain the smoker for optimal effectiveness:
Maintaining a smoker is essential to ensure optimal functionality and longevity. Here are some tips to keep your smoker in good condition:
- Regularly clean your smoker, removing any debris or ash.
- When not in use, cover the smoker with a protective cover to prevent rust and other damage.
- Check and clean the smokestack regularly, keeping it free of any obstructions.
- Use high-quality wood chips, as low-quality chips can produce excessive ash and negatively impact the smoker’s performance.
- Store the smoker in a dry location, preferably indoors, to prevent moisture from seeping in.
With proper maintenance, your smoker can provide years of excellent performance, providing you with deliciously charred meats and vegetables for many camping trips to come.
Suggestions for recipes and meal ideas:
Now that you know how to use and maintain your smoker, here are some recipe and meal ideas to get you started:
- Smoked chicken wings with a honey and sriracha glaze
- Smoked salmon with a lemon and herb marinade
- Smoked brisket with a homemade spice rub
- Smoked portobello mushrooms with a balsamic glaze
- Smoked corn on the cob with a garlic butter marinade
Experiment with different wood chips and marinades to create unique flavor profiles and take your camping meals to the next level. Happy smoking!
Frequently Asked Questions Of How To Make A Smoker While Camping
How Do I Make A Smoker While Camping?
To make a smoker while camping, you can use a metal container, charcoal, wood chips, and a grill rack. Punch holes in the container, create a two-zone fire, and put the rack on the container. Then cook your food on the rack.
What Type Of Wood Should I Use In My Smoker?
When smoking meat, use hardwood such as hickory, oak, mesquite, or fruitwood such as apple, cherry, or peach. The wood adds flavor to the meat and makes the smoke. Ensure that the wood is dry and soaked in water before use.
Can I Use A Cardboard Box Instead Of A Metal Container?
A cardboard box can be used as a smoker, but it can be dangerous as it may catch fire. It could be challenging to control the fire temperature in a cardboard box. It is best to use a metal container instead of a cardboard box for safety reasons.
How Do I Control The Temperature In My Smoker?
To control the temperature in your smoker, you should adjust the amount and pace of ventilation, monitor the temperature of the firebox and adjust the amount of fuel accordingly. Ensure to add charcoal and wood chips gradually to regulate temperature, smoking, and cooking time.
How Long Should I Smoke My Food?
The length of time needed to smoke food depends on the type and size of the food, the temperature, and the desired flavor. Typically, smoking meat takes between 2 to 6 hours. Check the meat protruding a thermometer into it, the internal temperature should be about 165°f.
Conclusion
As you can see, making a smoker while camping is easy and can be done in a variety of ways. From using a cardboard box to building a more complex smoker out of metal, there are options for every skill level and budget.
Remember to use dry wood and natural smoking materials to achieve the best results. With these tips and tricks, you’ll be able to enjoy delicious smoked meats and veggies on your next camping trip. Plus, the satisfaction of creating something useful from scratch will make your trip even more memorable.
So, what are you waiting for? Get creative, gather your materials, and start smoking!

Freda is a passionate foodie and kitchen gadget enthusiast. With over 10 years of experience in the culinary industry, Freda brings her expertise in testing and reviewing kitchen gadgets.