
To install a range hood on a slanted ceiling, follow the manufacturer’s instructions and use a sloped ceiling adapter. This will ensure proper installation and ventilation.
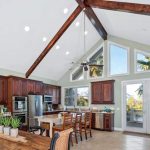
Installing a range hood on a slanted ceiling can be tricky, but with the right tools and knowledge, it can be done. A range hood is an essential part of any kitchen, as it helps to remove smoke, steam, and cooking odors from the air.
However, installing a range hood on a slanted ceiling requires a little extra effort. In this article, we will discuss the steps involved in installing a range hood on a slanted ceiling and provide tips to help you along the way.
Credit: www.architecturaldigest.com
Understanding Your Slanted Ceiling
Installing a range hood on a slanted ceiling might seem daunting, but with the right tools and understanding of your ceiling’s angle and slope, it can be a straightforward process.
Measuring Your Slanted Ceiling Accurately
Before you start any installation process, ensure that you measure your slanted ceiling accurately. Follow these steps to ensure you get the correct measurements:
- Measure the length of the ceiling from where you want to install the range hood to the highest point of the slope.
- Measure the height of the slope where you want to install the range hood to get the angle.
Knowing The Angle And Slope Of Your Ceiling
Knowing the angle and slope of your ceiling is crucial in determining how you will install the range hood. Here are the steps:
- Use a protractor to measure the angle of the slope. Note that the slope angle determines the type of range hood you can install.
- Determine the slope of your ceiling by measuring the rise and run of the slope.
Tools Needed For Measuring The Ceiling
For accurate measurements, you will need the following tools:
- A protractor
- A measuring tape
- A level to ensure that your measurements are accurate.
Now that you have accurate measurements for the slope and angle of your slanted ceiling, you are ready to start the installation process. Remember to always follow the manufacturer’s instructions to ensure a safe and secure installation.
Choosing The Right Range Hood For Your Slanted Ceiling
Understanding The Different Types Of Range Hoods Available On The Market
Range hoods are essential appliances that help ventilate your kitchen by filtering out smoke, steam, and grease from cooking activities. Depending on the design and shape of your kitchen, there are different types of range hoods available that you can install on your slanted ceiling.
Here are the different types of range hoods available on the market:
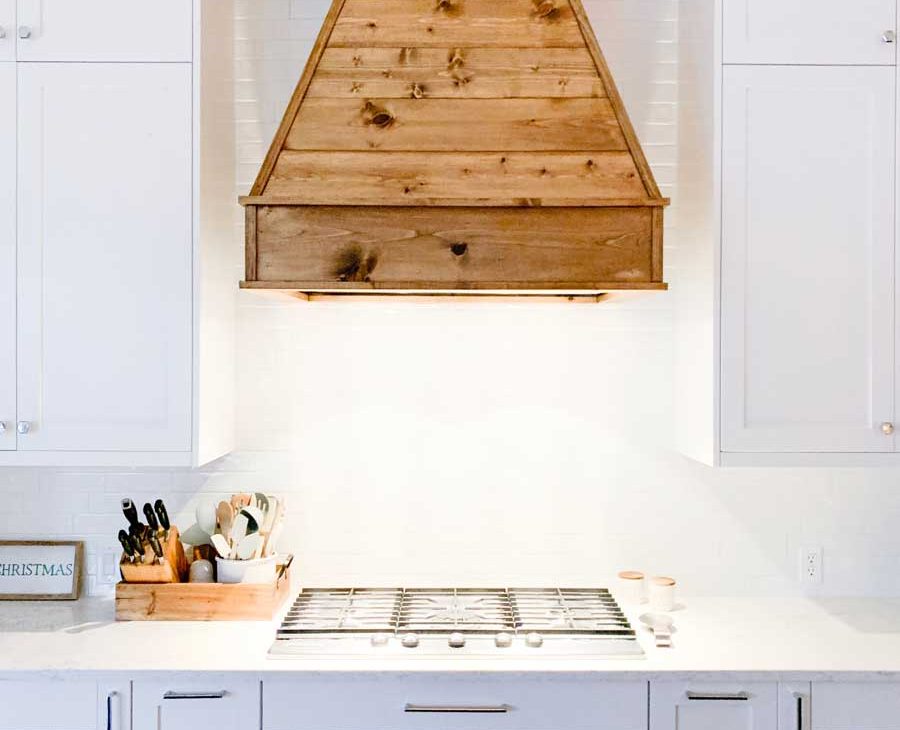
- Wall-mounted range hoods: These range hoods are specially designed to be anchored to the wall and are perfect for kitchens that have a traditional range smoker.
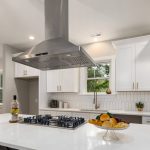
- Island range hoods: These are some of the most popular types of range hoods on the market due to their sleek and modern design. They are designed to hang from the ceiling and are perfect for kitchens with an island in the center.
- Downdraft range hoods: These range hoods work by pulling the smoke and grease downwards, rather than upwards. They are usually installed on cooktops that are placed next to a wall.
- Under-cabinet range hoods: These hoods are perfect for kitchens with limited space. They are installed under the cabinets and are excellent at removing smoke, steam and grease from your kitchen.
Selecting The Most Suitable Range Hood For Your Slanted Ceiling
When selecting a range hood, there are a few key factors that you need to consider. Here are some of the things that you need to keep in mind before purchasing your range hood:
- Size: The size of your range hood is an essential factor to keep in mind. It is essential to select a range hood that is appropriately sized for your cooktop.
- Ductless vs. ducted: Ductless range hoods filter the air through a charcoal filter before recirculating the air back into the kitchen, while ducted range hoods expel the air outside. Depending on your kitchen’s design and your personal needs, you will have to choose between the two.
- Cfm rating: Cfm stands for cubic feet per minute. It is a measure of the airflow rate that the hood can handle. Depending on your cooking needs, you may require a higher cfm rating.
Considerations To Make Before Purchasing Your Range Hood
There are a few other factors that you need to consider before purchasing your range hood. Here are some of the things that you need to keep in mind:
- Ceiling angle: The first thing that you need to consider is the angle of your ceiling. It is essential to choose a range hood that is designed to be installed on a slanted ceiling.
- Noise level: The noise level is an important factor to keep in mind, especially if your kitchen is adjacent to living spaces inside your house.
- Style: The style of range hood that you choose should match the overall design and aesthetics of your kitchen.
- Budget: Range hoods come in different price ranges, and you need to choose one that suits your budget.
Pre-Installation Preparations
If you’re looking to install a range hood on a slanted ceiling in your kitchen, then it’s best to start with the necessary pre-installation preparations. This will ensure a smooth and successful installation process. Here are a few things to keep in mind:
Necessary Permits You Need For Installation
Before starting any type of work in your home, it’s important to check with your local authorities to see if any permits are necessary for the installation of a range hood. This will ensure that you’re in compliance with any local building codes and regulations and will help avoid any potential fines or legal issues down the line.
Creating A Plan For The Installation Process
Proper planning is crucial when it comes to installing a range hood on a slanted ceiling. Before you start, take the time to create a detailed plan of what needs to be done. This should include a list of all the necessary tools and supplies, as well as a step-by-step guide on how to install the range hood.
Here are some key points to keep in mind when creating your installation plan:
- Measure your space and select a range hood that fits well with your ceiling slope.
- Make sure to turn off the power source to the area where you’ll be installing the hood.
- Prepare the area around the installation site by removing any obstacles.
Important Safety Precautions To Take During Installation
Installing a range hood on a slanted ceiling can be a bit more challenging than on a flat ceiling. Therefore, it’s important to take a few key safety precautions to ensure that the installation process is done safely and effectively.
Here are some important safety tips to keep in mind:
- Wearing safety goggles, gloves, and a hard hat is always a good idea when installing range hoods.
- Make sure to recruit a second person to help with the installation process and to hold the range hood in place while you work.
- Always follow the manufacturer’s instructions carefully and double-check all your work to ensure everything is done correctly.
By following these pre-installation preparations, you’ll be able to approach the installation of your range hood with confidence and ease.
Step By Step Guide To Installing Range Hood On A Slanted Ceiling
If you have a slanted ceiling in your kitchen and you want to install a range hood, don’t worry! It’s entirely doable with a little bit of patience and the right tools. Follow this step-by-step guide to installing a range hood on a slanted ceiling.
Install The Mounting Bracket
The mounting bracket is the first step in installing a range hood on a slanted ceiling. Here’s how to do it:
- Determine the location of the range hood and mark it on the ceiling.
- Attach the mounting plate to the ceiling, making sure it’s secure.
- Ensure the mounting plate is level and in the correct position for the range hood.
Install The Ductwork
Installing the ductwork for your range hood is crucial to provide proper ventilation. Follow these steps:
- Figure out the layout of the ductwork you need and plan accordingly.
- Carefully cut the vent hole in the ceiling using appropriate tools.
- Attach the ductwork to the vent hole in the ceiling, making sure it’s secure.
- Run the ductwork through the attic or any other spaces to the location where the range hood will be installed.
Installing The Range Hood Onto The Bracket And Ductwork
The next step is to put the range hood into position and connect it to the bracket and ductwork. Here’s what to do:
- Put the range hood onto the mounting bracket, making sure it’s level.
- Connect the range hood to the ductwork, using appropriate vent duct tape to seal the connection.
- Confirm that the range hood is properly secured in place on the mounting bracket.
Electrical Wiring And Power Connection
Before you can use the range hood, you need to connect it to power. Here’s how:
- Follow the manufacturer’s instructions for electrical wiring to avoid any damage to the range hood or fire hazard.
- Wire the range hood to the existing electrical supply by connecting the black wires to the black wires and the white wires to the white wires, and the green wire (ground) to the grounding wire.
- Turn on the power and check the range hood to make sure it’s working properly.
Installing a range hood on a slanted ceiling can be challenging, but following these steps will make it much more manageable. By installing the mounting bracket, ductwork, connecting the range hood, and electrical wiring, you’ll have a fully functional hood that will help keep your kitchen well-ventilated.
Frequently Asked Questions For How To Install A Range Hood On A Slanted Ceiling
How Do You Measure For A Range Hood On A Slanted Ceiling?
To determine the correct size of the range hood for a slanted ceiling, measure the width and depth of the stove. Measure the height of the ceiling at the installation location. Record the slope angle of the ceiling. Your range hood should extend beyond the cooktop by 3 inches on each side.
Can You Install A Range Hood On A Slanted Ceiling Without Ductwork?
Yes, you can install a range hood on a slanted ceiling without ductwork by using a ductless range hood. A ductless range hood features charcoal filters that capture grease, smoke, and cooking odors. The filtered air is then recirculated back into your kitchen.
How High Should A Range Hood Be Above A Cooktop On A Slanted Ceiling?
The range hood should be mounted 30 to 36 inches above the cooktop surface on a slanted ceiling. If the range hood is too high, the suction power will be less, while if it’s too low, the hood’s motor will be noisy, making it less efficient.
What Tools Do You Need To Install A Range Hood On A Slanted Ceiling?
To install a range hood on a slanted ceiling, you will require essential tools like a drill, drill bits, a jigsaw, and wood screws. To complete the installation, you may also need a stud finder, level, tape measure, a screwdriver, and a pencil.
Can You Install A Range Hood On A Slanted Ceiling Yourself?
Yes, you can install a range hood on a slanted ceiling yourself, but it is best to seek professional help if it’s your first installation. If you have experience, you can follow the manufacturer’s installation instructions carefully, ensuring all the necessary precautions are taken.
Conclusion
After following the step-by-step instructions in this guide, you should have no trouble installing a range hood on a slanted ceiling. It’s important to remember to take your time, measure correctly, and use the right tools for the job. Installing a range hood may seem daunting at first, but with a little bit of patience and effort, anyone can do it.
Additionally, make sure to keep safety in mind at all times. If you run into any issues or have any questions during the process, don’t hesitate to consult with a professional. Once your range hood is up and running, you’ll enjoy a cleaner and safer cooking environment in your kitchen.
Thank you for reading this guide, and happy installation!

Freda is a passionate foodie and kitchen gadget enthusiast. With over 10 years of experience in the culinary industry, Freda brings her expertise in testing and reviewing kitchen gadgets.